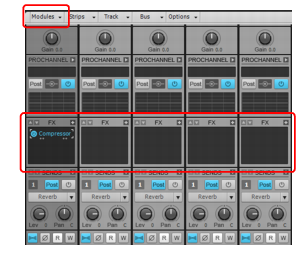
At this point, you should have a basic mix. Everything is generally where you want it to be and it's time to use some audio effects to tweak it all to perfection. Effects placed directly on an audio track are called
inserts.
Compressor/Gate. This plug-in affects the loudness of the sound. It can limit how loud a sound can get. It can also limit how soft a sound can get before it's completely turned off.
EQ. EQ can accentuate or turn down a certain frequency range in a sound. For example, if you have an unwanted high-pitched buzz on one of your tracks, an EQ may be able to turn that high frequency down without affecting the sound of the instrument.
Reverb. Reverb creates an artificial space. It produces echoes that are similar to the natural echoes that happen when a sound bounces off the walls in a room.
Delay. Delay plug-ins have the ability to create an echo. However, it's typically more distinct than that of a reverb. It makes a sound repeat, often in a rhythmic, musical manner.
These are the effects we'll be focusing on in this tutorial. However, other effects are available and you should experiment with each one to discover how they can be used in your mixes. To get online Help for a particular plug-in, simply click one of its controls and press the F1 key on your computer keyboard.
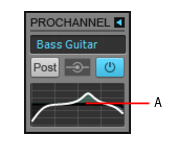
While adjusting track levels in a song, you might notice that some tracks are too dynamic. Sometimes they're too loud, other times too soft. In most modern music, the important elements in a mix are focused in a specific volume range. This is done with a
compressor.
The purpose of a compressor is to limit the dynamic range of music or sound. Compression will make the loud parts of the signal quieter, resulting in a more or less even level. That even level can then be increased to fit more specifically in the mix.
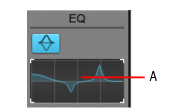
One of the primary uses for EQ is to prevent different instruments from stepping on each other in the frequency spectrum. One instrument might be intended for a certain frequency range, but extends into another instrument's frequency range. This can easily happen with drums and bass. If you turn down the overlapping frequency range for one of the instruments, it will allow the other instrument to stand out better in the mix.
The first thing we'll do is add a delay effect. A delay effect can really enhance an instrument. In our tutorial project, we will add the Delay effect to the track name
Chirppy Synth, which sounds very dry and lifeless. Applying a delay might give it more depth.
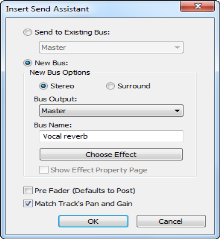
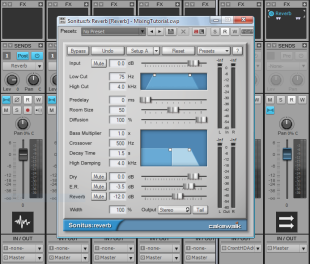
This is a good starting point. Sometimes the best way to familiarize yourself with a new effect plug-in is to dig in and start tweaking.Next, we'll apply some reverb to the project. Think of a reverb effect as an artificial room. We could add a separate reverb to each track, but when multiple reverbs are running at the same time it can sound “cloudy”. This might be because our ears are used to hearing sounds bounce of walls naturally. A reverb on each track would sound like you have one instrument in one room, another instrument in another room, and so on.
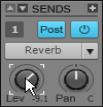
Instead, we will add a single reverb effect to a bus, then send each track to that bus, at varying levels.This is where SONAR's advanced mixing environment offers a lot of flexibility. We will add a control to each track, which adjusts how loud a copy of the track's sound is sent to the bus. This will sound more natural since it's similar to the behavior of an actual acoustic space. All of the different sounds can interact with each other in the “virtual room” we're creating with the reverb.